
Appearance
System Connections
A System Connection is the pointer to a Configuration Database. It contains the necessary information for Flow to connect to a configuration database. You need one System Connection for each configuration database you are working with.
The following properties are configured when setting up a System Connection.
| Property | Description |
|---|---|
| Friendly Name | This is the name by which the connection is known as. It is the name display in the Connect To drop down box on the Flow login window. |
| Computer Name | This is the name of the SQL Server instance that hosts the configuration database. For the default Flow SQL Server instance enter <computername>\Flow. For SQL Compact leave this blank. |
| Database Name | This is the name of the database under the above SQL Server instance. You can see a list of these databases using Microsoft SQL Management Console. |
| Username | This is the SQL Server username that you will use to connect to the database. Leave this blank if using Windows Authentication. For more information refer to Using SQL Server Authentication and/or Using Windows Authentication |
| Password | Enter the password for the above user. Leave this blank if using Windows Authentication. |
TIP
System Connections are stored in the Connections.ini file. No matter which computer you run the Flow console from it will still contain the same list of System Connections in the login window
System Connections are configured from the Flow login window.
Opening the System Connections Editor
In the Login window select <Setup Connections...> from the Connect To drop down to access the System Connection editor.
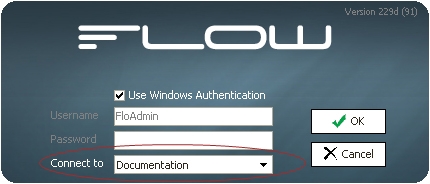
The System Connections editor allows you to create new pointers to configuration databases. You will need to create the new configuration database using a tool like Microsoft SQL Management Console.
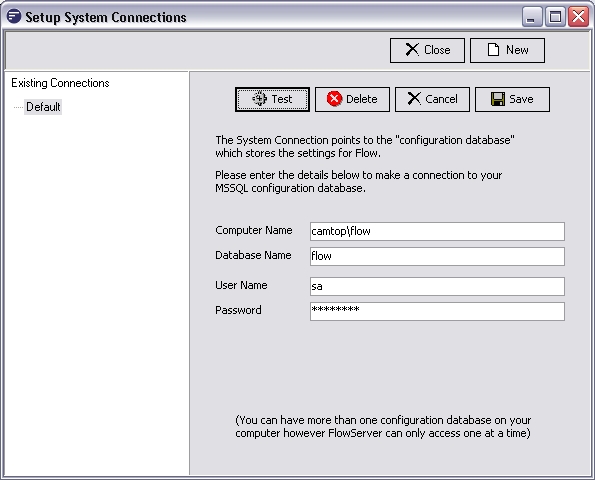
Creating New System Connections
- Open the System Connections editor
- Click the
Newbutton and a new connection appears in the list on the left hand side - Enter a
Friendly Nameand then reselect it to display the details of the connection - Fill in the
Computer Name,Database Name,User Name, andPasswordwith the appropriate details - Click the
Testbutton to ensure it works, then clickSave - When you return to the Login window you will see your new connection
Editing an existing System Connection
- Open the System Connections editor
- Select the connection you wish to edit from the list on the left hand side
- Modify the details with appropriate settings
- Click the
Testbutton to ensure it works, then clickSave
Deleting an existing System Connection
- Open the System Connections editor
- Select the connection you wish to delete from the list on the left hand side
- Click the
Deletebutton