
Appearance
IIS Manager
The IIS Manager is a windows management console. It allows a user to manage web sites that are installed on the computer. This is used to manage FlowWeb and FlowTransportWeb.
The IIS Manager can be used to add/remove web sites and virtual directories, start/stop web sites, and change configuration properties of the web server. For complete information on using IIS Manager please refer to its help files.
TIP
Both FlowWeb and FlowTransportWeb are added as virtual directories on the IIS Manager. However there are times when you need to first add a new web site under which the virtual directories are added. New web sites are used when you want to specify a custom port for the client to connect to.
Opening the IIS Manager
Select
Start > Control Panel > Administrative Tools > Internet Information Services(these steps may differ depending on the operating system and its configuration)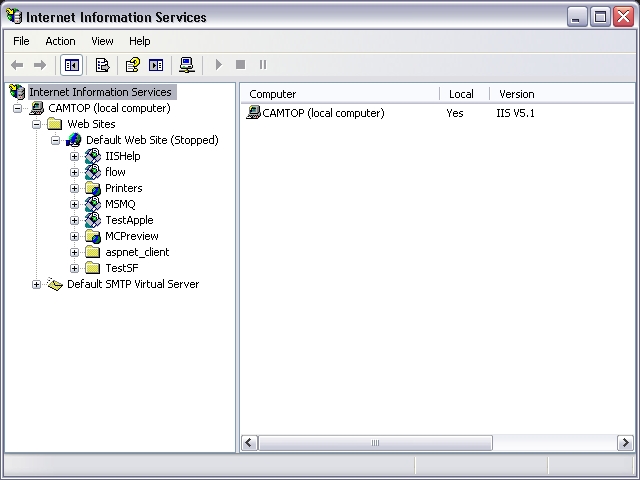
Starting / Stopping a web site
- Open the IIS Manager
- Expand the
Web Sitesfolder in the left hand tree menu - Right click the web site you wish to start / stop and select either
StartorStopmenu item
Adding a Virtual Directory
Open the IIS Manager
Expand the
Web Sitesfolder in the left hand tree menuExpand the web site where you want to add the virtual folder. Expand further folders until you come to the folder which you want to hold the virtual folder. Right click that folder and select
New > Virtual Directory. ClickNextWhat location should I use for FlowWeb and FlowTransportWeb?
For FlowWeb you should create the virtual directory directly under the main web site folder. For FlowTransportWeb you should create the virtual directory directly under the FlowWeb virtual directory folder
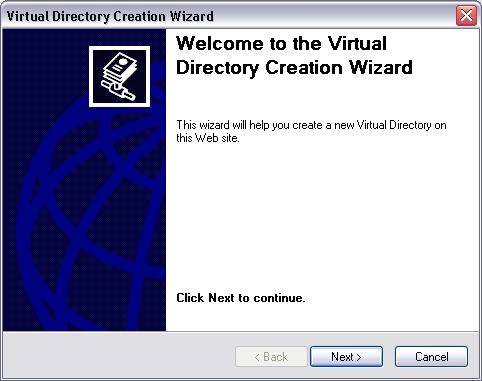
Enter the
Aliasfor the virtual folder. This is the name it will be displayed as in the IIS Manager, as well as being the named used in the URL when accessing the virtual folder through the web. ClickNextWhat alias should I use for FlowWeb and FlowTransportWeb?
For FlowWeb you should use the alias
Flow. For FlowTransportWeb you should use the aliasTransport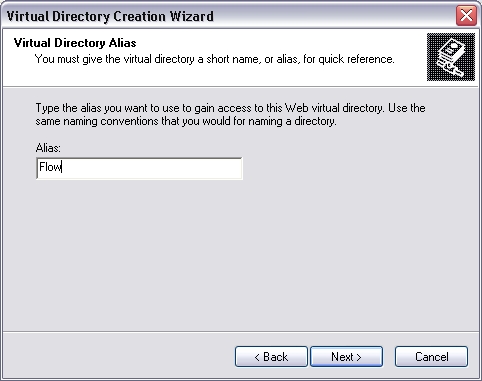
Enter the
Directorywhere the web site is located. ClickNext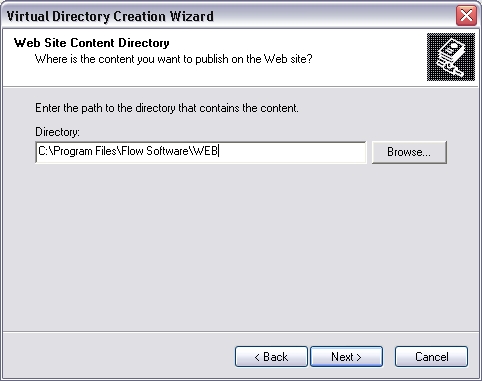
Ensure
ReadandRun Scripts (such as ASP)is checked. ClickNext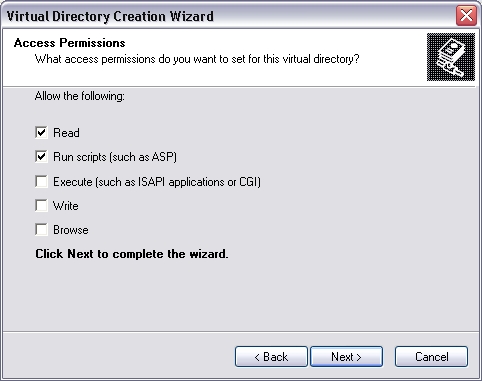
Click
Finish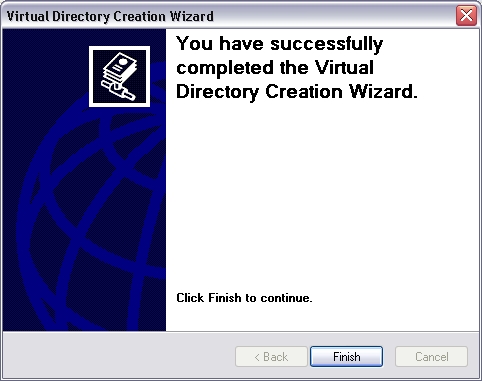 :::
Removing a Virtual Directory
Open the IIS Manager
Expand the
Web Sitesfolder in the left hand tree menuExpand the web site until you find the virtual folder you wish to remove. Right click that folder and select
Delete. AnswerYesto the message
Adding a web site
WARNING
You can only have multiple web sites when IIS is installed on Windows 2000/2003/2008 Server
- Open the IIS Manager
- Right click the
Web Sitesfolder and selectNew > Web Site - etc...need images from Win2003server
Removing a web site
- Open the IIS Manager
- Right click the
Web Sitesfolder and select Delete - etc...need images from Win2003server
Changing the web site port
Open the IIS Manager
Expand the
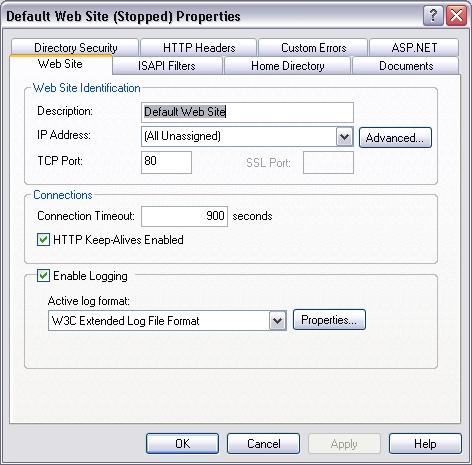
Web Sitesfolder in the left hand tree menuRight click the web site that you wish to alter the port for and select
Properties. Edit the TCP Port to the desired value and clickOKHow do I set the SSL Port?
You can only set the SSL Port if you have a SSL Certificate installed. Refer to Installing a SSL Certificate
 :::
Checking the ASP .Net Version
TIP
Flow requires Microsoft .Net 3.5 to work correctly. This is however not an option in the IIS configuration. Instead you should choose ASP .Net 2.0.50727 and this will cause it to use .Net 3.5
Open the IIS Manager
Expand the
Web Sitesfolder in the left hand tree menuRight click the web site that you wish to alter the ASP .Net version and select
Properties. Select theASP.NETtab. EnsureASP.NET versionis set to 2.0.50727 and clickOK.What if v2.0.50727 is not available in the list?
If this version is not present in the list you mayneed to install Microsoft .Net Framework 3.5 (Refer Third Party Components). You also need to check that this version has been
Allowedfor IIS. Refer to theWeb Service Extensionsitem on the IIS Manager tree menu (only on Windows Server)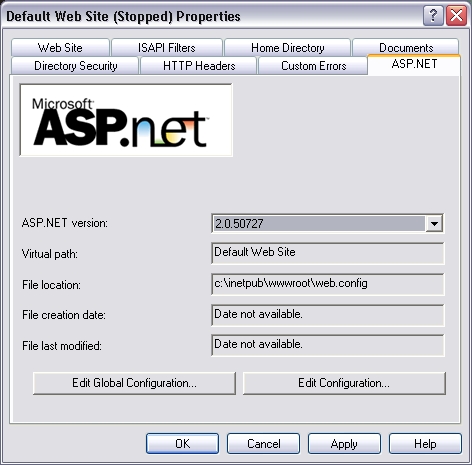
Installing a SSL Certificate
To install an SSL certificate you must first generate a CSR (Certificate Signing Request). You can then send this CSR to any public SSL certification provider to purchase a SSL certificate. The resulting certificate then needs activation within IIS.
TIP
A CSR is also needed if you are generating a self-signed certificate. A self-signed certificate is free since it is not issued by a public certificate authority however it is not automatically trusted by other computers. You will need to send them the certificate and have them install it into their certificate store. We do not recommend that you use a self-signed certificate.
Creating a SSL Certificate Signing Request (CSR)
Open the IIS Manager
Expand the
Web Sitesfolder in the left hand tree menuRight click the web site that you wish to enable SSL and select
Properties. Select theDirectory Securitytab and click theServer Certificatebutton.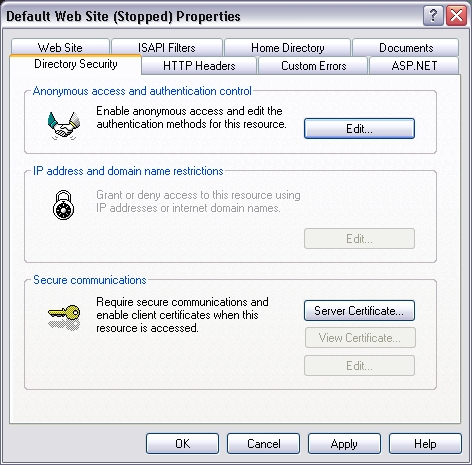
Click
Next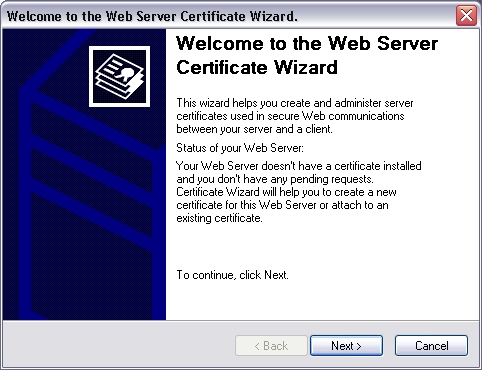
Select
Create a new certificateand clickNext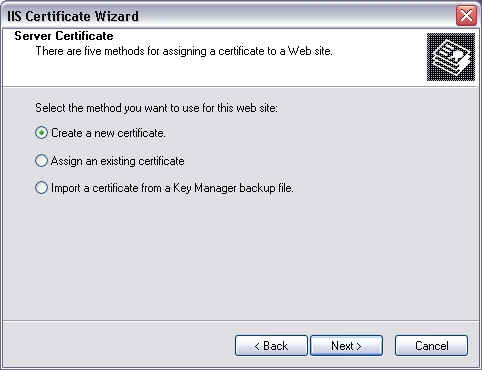
Select
Prepare the request now, but send it laterand clickNext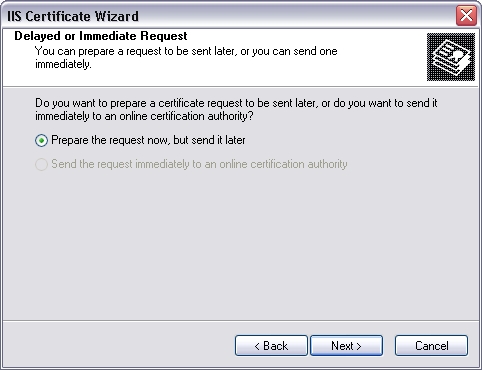
Enter the
Nameof the certificate. This MUST be the domain name through which the web site will be accessed by your trading partners. This could be for example www.yourdomain.com or flow.yourdomain.com. You need to ensure that this domain name points to your external IP address which this computer is accessed through - for this reason we recommend flow.yourdomain.com as this can then be modified independent of your other domains. ClickNext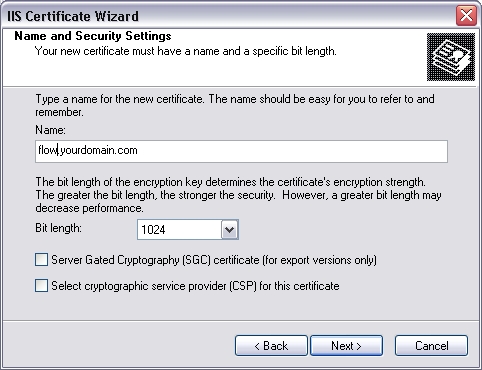
Enter your
Organization NameandOrganizational Unit. We highly recommend that Organization Name is your actual company name. Organization Unit can be anything that helps you and your trading partner identify the purpose of the SSL certificate. ClickNext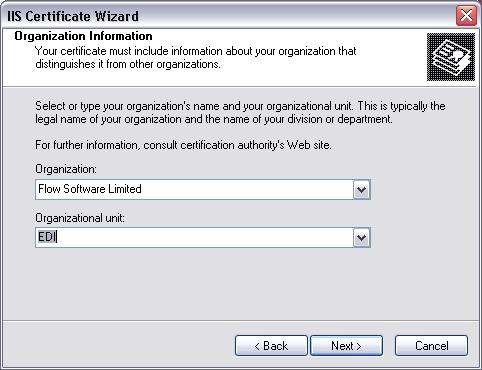
Enter the
Common Nameof the certificate. This MUST be the same as the name entered in step 7 above. If it is not the same as the domain name used to access your web site then the certificate will not work and you need to re-purchase one.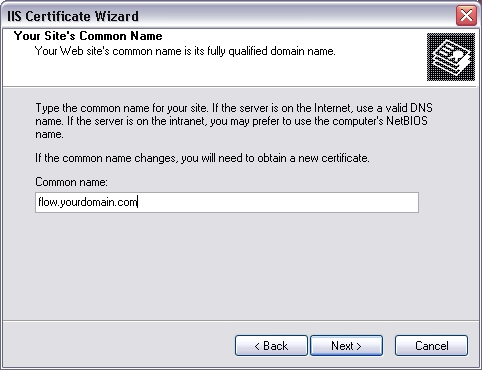
Select your
Country/Region, and enter the other optional details appropriately. ClickNext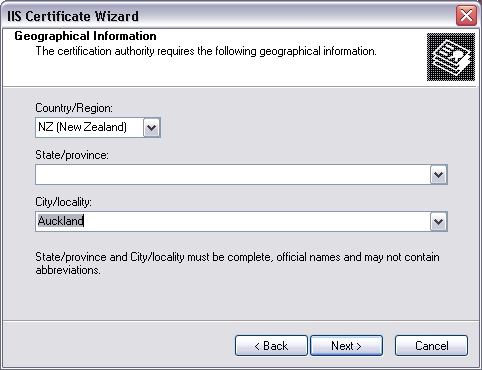
Enter the
File namewhere the CSR will be saved. Remember this location as you will need the CSR later to complete the purchase of the certificate.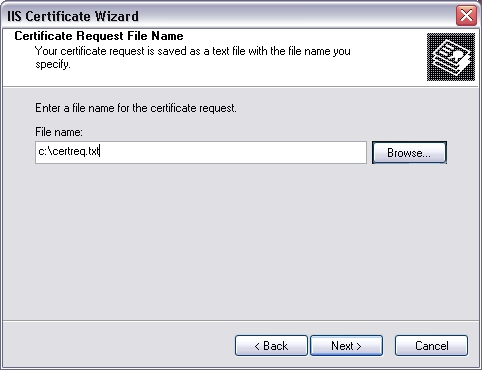
Check the details are accurate and there is no spelling mistakes. DOUBLE CHECK SPELLING. Click
Next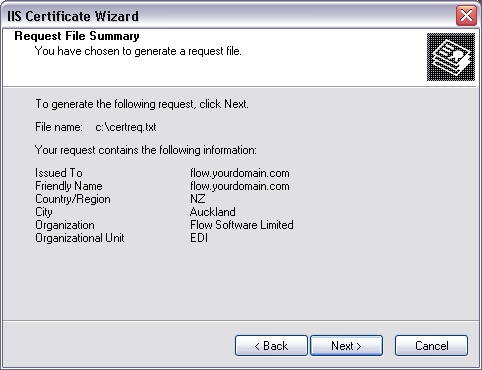
Click
Finish, then find your saved CSR for completing the purchase of the certificate.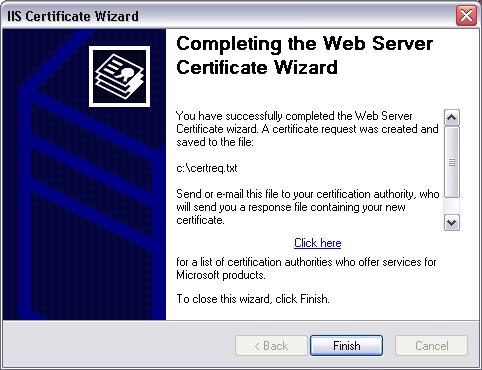
Purchasing a SSL Certificate
TIP
We recommend Essential SSL certificates from www.instantssl.com. They are highly secure and can be purchased and downloaded immediately without having to send company identification documents to them. They meet all the requirements for a SSL certificate for transacting EDI documents.
- First create a CSR using the above steps
- Visit www.instantssl.com and follow the on screen steps for purchasing an
Essential SSLcertificate. (You can use any other public certificate provider that you wish) - Save the resulting SSL certificate in a secure location. You will need this for the following steps to activate the certificate within IIS.
Activating a SSL Certificate
Open the IIS Manager
Expand the
Web Sitesfolder in the left hand tree menuRight click the web site that you wish to enable SSL and select
Properties. Select theDirectory Securitytab and click theServer Certificatebutton.Click
NextSelect
Process the pending request and install the certificateand clickNext. (If this screen shows an option to Create a new certificate then you have not performed the steps to create a CSR (refer to above process). If you want to recreate the CSR then selectDelete the pending request)Enter the path to the certificate you received from your public certificate authority. Click
Next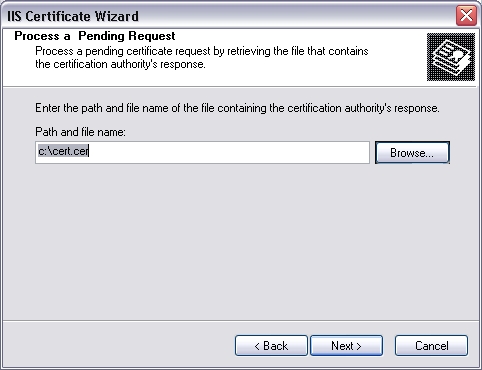
Select the
Portthat to use for SSL communication. ClickNextClick
Finish. You are now able to set the SSL Port as well as the TCP port on the web sites properties page.